
In today’s article, I’ll show you how I created a global banner system in WordPress that allows for flexible management of marketing content across the entire site. The system uses Advanced Custom Fields Pro and enables not only the creation of different types of banners but also their intelligent placement within the content.
Preparing the Basic Structure
Creating a Flexible Container
The first step is creating a basic field group in ACF:
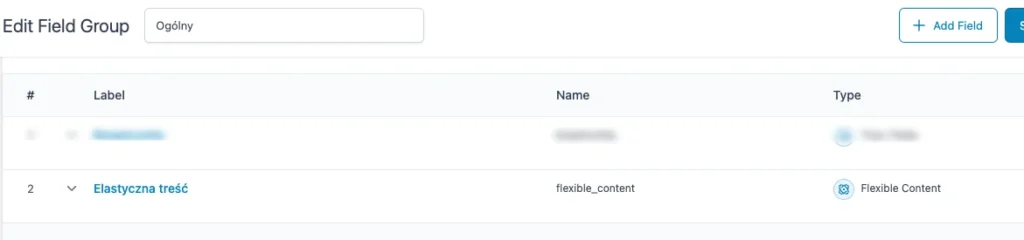
I created a new field group in the ACF panel called “Flexible Content” (flexible_content). I chose the Flexible Content field type, which gives us amazing flexibility – we can add, remove, and rearrange sections as needed. Then, I created 3 empty sections corresponding to our banners, giving them appropriate names.

💡 Pro tip: Flexible Content in ACF is a powerful tool that allows for dynamic management of page sections.
Display Configuration

A key element was properly configuring the display rules in ACF:
- Set display for the “General” template
- This ensures fields are only available where we actually need them
- Prevents cluttering the admin panel with unnecessary options
Changing Page Template for Individual Subpages
At this point, we can change the template to general, to which additional ACF sections are assigned.

Creating the Main Template
In the child-theme root folder, I created main.php and implemented the handling of our flexible sections:
<?php
/* Template Name: Ogólny */

get_header();

if(have_rows('flexible_content')):
    while ( have_rows('flexible_content') ) : the_row();
        // Obsługa poszczególnych sekcji
        if( get_row_layout() == 'section_31' ):
            get_template_part('components/sections/section_31');
        // ... kolejne sekcje
    endwhile;
endif;

get_footer();
?>
💡 Best practice: I use
get_template_part()instead of directly including files. This provides not only cleaner structure but also better support for child themes.
Banner Implementation
Creating the “Repeatable Sections” Group
In the ACF panel, we create a new field group.

Adding Fields to WordPress Panel
We implement field visibility in the admin panel. This can be added in functions.php or another file linked in functions.php:
if( function_exists('acf_add_options_page') ) {
acf_add_options_page(array(
'page_title' => 'Sekcje powtarzalne',
'menu_title' => 'Sekcje powtarzalne',
'menu_slug' => 'repeatable-sections',
'capability' => 'edit_posts',
));
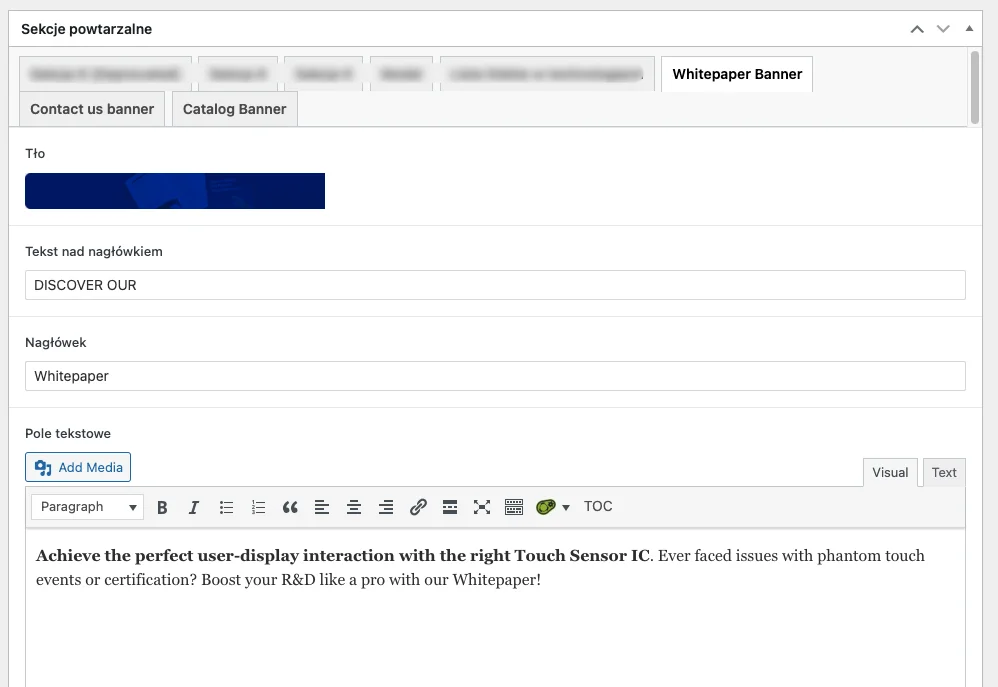
}Whitepaper Banner (section_31)
In repeatable sections, we fill in the placeholders. This banner is used to promote educational materials. It consists of:
- Background (image)
- Text above heading (text)
- Main heading (text)
- Text field (WYSIWYG)
- CTA button (link)
Adding Remaining Banners
Similarly, we create structures for other banner types:
- Contact us Banner (section_32)
- Catalog Banner (section_33)
Implementing Banner Templates
Component File Structure
We create a directory structure for our components:
components/
└── sections/
    ├── section_31.php
    ├── section_32.php
    └── section_33.php
Implementing Whitepaper Banner
In section_31.php, we implement the banner structure:
<?php
$background = get_field('section_31_background', 'option');
$above_heading = get_field('section_31_above_heading', 'option');
$heading = get_field('section_31_heading', 'option');
$text_field = get_field('section_31_text_field', 'option');
$link = get_field('section_31_link', 'option');
?>

<div class="section_31 vertical-mobile-margin--100">
    <div class="container-fluid">
        <div class="section_31__content" style="background-image: url('<?php if($background){echo $background['url'];} ?>');">
            <div class="section_31__left">
                <?php if($above_heading): ?>
                    <p class="section_31__orange-text"><?= $above_heading; ?></p>
                <?php endif; ?>
                <?php if($heading): ?>
                    <h2 class="heading-1"><?= $heading; ?></h2>
                <?php endif; ?>
            </div>
            <!-- Pozostała część struktury -->
        </div>
    </div>
</div>
Styles and Appearance
For each banner, I defined appropriate CSS styles. I’m omitting the element styling here.
.section_31__content {
    background-position: center;
    background-repeat: no-repeat;
    background-size: cover;
    border-radius: 2.4rem;
    overflow: hidden;
    padding: 2rem;
    display: grid;
    grid-template-columns: auto 1fr;
    align-items: center;
    gap: 4rem;
}
Global Placement System
The most advanced element is the intelligent banner placement system for different types of pages. Currently, we can use these banners on any subpage that has its page template set as “General”. However, I want to add them to every blog post, which is also divided into different post types, as well as to product pages.

Implementation in Single Posts
In the single-knowledge.php file (equivalent to single.php, different post type), I added the structure for banners:
<div class="additional-sections">
                <!-- whitepaper (hidden by default) -->
                <div class="global-sections whitepaper-section js-hidden">
                    <div data-section="31">
                        <?php get_template_part('components/sections/section_31'); ?>
                    </div>
                </div>
                <!-- catalog (hidden by default) -->
                <div class="global-sections catalog-section js-hidden">
                    <div data-section="33">
                        <?php get_template_part('components/sections/section_33'); ?>
                    </div>
                </div>
                <!-- contact (always visible) -->
                <div class="global-sections contact-section">
                    <div data-section="32">
                        <?php get_template_part('components/sections/section_32'); ?>
                    </div>
                </div>
            </div>
Loading JavaScript on Appropriate Subpage Types
We load the script only on pages where banners are visible to avoid unnecessary page code loading:
<?php
function global_banners_placement_script() {
    // Check if we're on a single blog post, news post, or product page
    if (is_singular('post') || is_singular('news') || is_singular('product')) {
        wp_enqueue_script(
            'global-banners-placement',
            get_template_directory_uri() . '/assets/js/global-banners-placement.js',
            array('aos-js'), // Adding AOS as a dependency
            '1.0.5',
            true
        );
    }
}
add_action('wp_enqueue_scripts', 'global_banners_placement_script');
JavaScript for Display Management
I created a script that analyzes the page structure and places banners in appropriate locations:
function initializeWhitepaperPlacement() {
    const bodyClasses = document.body.classList;
    const isPostOrNews = bodyClasses.contains('single-post') || bodyClasses.contains('single-news');
    const isProduct = bodyClasses.contains('single-product');

    if (!isPostOrNews && !isProduct) {
        return;
    }

    if (isProduct) {
        handleProductPage();
    } else {
        handleBlogPage();
    }
}

function handleBlogPage() {
    const tocList = document.querySelector('.ez-toc-list');
    if (!tocList) {
        return;
    }

    // Get all required elements
    const contentArea = document.querySelector('.post-sections');
    const whitepaperSection = document.querySelector('.whitepaper-section');
    const catalogSection = document.querySelector('.catalog-section');

    // Handle catalog first (2nd heading)
    const secondHeadingLink = tocList.querySelector('li:nth-child(2) .ez-toc-link');
    if (secondHeadingLink && catalogSection) {
        const secondHeadingId = secondHeadingLink.getAttribute('href').substring(1);
        const targetHeading = document.querySelector('#' + secondHeadingId);

        if (targetHeading) {
            catalogSection.classList.remove('js-hidden');
            targetHeading.parentNode.insertBefore(catalogSection, targetHeading);
            initializeAOS(catalogSection);
        }
    }

    // Handle whitepaper second (3rd heading)
    const thirdHeadingLink = tocList.querySelector('li:nth-child(3) .ez-toc-link');
    if (thirdHeadingLink && whitepaperSection) {
        const thirdHeadingId = thirdHeadingLink.getAttribute('href').substring(1);
        const targetHeading = document.querySelector('#' + thirdHeadingId);

        if (targetHeading) {
            whitepaperSection.classList.remove('js-hidden');
            targetHeading.parentNode.insertBefore(whitepaperSection, targetHeading);
            initializeAOS(whitepaperSection);
        }
    }
}

function handleProductPage() {
    // Your existing product page handling code
}


// Initialize on DOM load
document.addEventListener('DOMContentLoaded', initializeWhitepaperPlacement);
Key placement rules:
- Contact Banner always at the end
- Whitepaper before the third heading (or hidden if the article is shorter)
- Catalog Banner before the second heading (or hidden if the article is shorter)
Why This Solution?
This system has several key advantages:
- Central management: All banners can be edited in one place
- Flexibility: Easy to change banner order and content
- Easy expansion: Modular structure allows for easy addition of new banner types
Summary
This banner system significantly improves marketing content management on the site. By combining ACF Pro, flexible PHP structure, and intelligent JavaScript logic, we get a tool that is:
- Easy to manage for administrators
- Flexible to expand for developers
- Effective in presenting content to users
💡 Final tip: Always think about future expansion when designing such systems. Modular structure and clean code organization are key to easy maintenance and development.